Sharing my stories, recipes, pictures, tidbits about food as well as restaurant and product reviews.
April 17, 2013
Springy Lemon Coconut Bars
This time of year makes me want to book my calendar with weekly Sunday brunches for the ladies. I love to search for spring brunch ideas and bookmark décor and menu ideas. My Pinterest boards are growing. I have several ideas in mind but really need to narrow it down to more reasonable and budget-friendly options. I get too excited sometimes and plan for extravagant décor and menu only to realize the important thing is to make quick and delicious options so that I have more time to hang out and relax with the ladies. A girl can dream though.
It doesn’t take much time, energy or cash to throw together a brunch. For example, I usually have a main dish such as a spinach quiche. I always have fruit in some form. My favorite is to just slice up strawberries and grapes and stir together with whole blueberries. Keep it simple. And I like to have a sweet dessert type dish if my main is savory. So I’ll have coffee cake or mini muffins made up from the day before to save me time the day of. That’s really all there is to it.
For beverages, I like to have lemonade or tea as well as ingredients for mimosas on hand. That way everyone has the option to have plain juice or kick it up with a splash of champagne. I usually have a couple of juices to try out. For Valentine’s brunch, I had blood orange juice and it was a hit over the normal orange juice. Plus it was a festive reddish-orange color.
These bars would make a great sweet addition to any brunch menu or just a sweet gift for a sweet friend. I found a few recipe ideas for lemon bars, lime bars and also ones that included coconut, which I love. It gives the bars a great texture and boost of flavor. Some lemon bars to me are too custard-like which I’m not always in the mood for. This filling sets up just right in my opinion. The coconut is optional if you’re not a fan.
Crust
1 c flour
1/4 c powdered Sugar
1/2 c (1 stick) butter, cold
Filling
3/4 c granulated sugar
1/4 c flour
1/2 tsp baking powder
2 large eggs, beaten
3 tbsp fresh lemon juice
1 – 1 ½ tsp lemon zest
1/2 c sweetened, flaked coconut
Preheat oven to 350 degrees. In a small bowl, combine flour and powdered sugar. Cut in butter with a fork or fingers until mixture resembles coarse meal. Press crust mixture evenly into a greased, 8 x 8-inch baking pan. Bake for 15 minutes. Set aside to cool while you prepare the filling.
Stir together sugar, flour and baking powder. Add beaten eggs; combine thoroughly. Add lemon juice, lemon zest and coconut. Blend well so all ingredients are incorporated. Pour onto cooled crust.
Bake for 25 minutes or until lightly browned on top. Cool. To help set up faster, place in the fridge for 30 minutes or more. Sprinkle with powdered sugar. Cut into bars. Store covered in the fridge so they stay firm.
February 26, 2013
Meatball Grilled Cheese Goodness
Attention people! A standard grilled cheese rocks my tastebuds! But THIS meatball grilled cheese rocked my world. I used leftover homemade meatballs from the previous night. You can make your favorite meatballs or use frozen. I highly recommend putting in the effort to make your own meatballs my friends. It's totally worth it and super simple. I'm sure you can find a great recipe out there. Maybe I'll share mine if you're totally nice and leave a comment on this post.
I used shredded cheese vs sliced because I feel it melts much faster. Plus it's what I had on hand. I served with these new garlic parmesan pretzel crisps I found and they went together perfectly.
2 slices of bread (I used whole wheat)
butter
mozzarella cheese, shredded
parmesan cheese, shredded
meatballs
marinara sauce
Butter both sides of each bread slice. Preheat skillet over medium-high heat. Add a small pad of butter to pan and spread around until melted. Add bread slices to hot pan. Brown until golden. Flip over one slice and add a few tablespoons of mozzarella cheese. Then top cheese with sliced (cooked meatballs). I use about 2-3 meatballs each sliced 3-4 times. Then top with more mozzarella cheese and a sprinkling of parmesan cheese. Then top with next slice of bread (hot side down over cheese so it makes the inside all warm and melty). Press sandwich down with spatula. Cook until golden on both sides and cheese is melty.
Serve with your favorite marinara sauce. I like to warm it up in a small dipping bowl in microwave while the last side of my sandwich is browning. Make sure to cover the bowl with a paper towel so it doesn't splatter everywhere. It only takes about 20-25 seconds. Enjoy!
January 10, 2013
Quick Mini Pie Bites
I love tiny desserts! I love them even more when they are super simple. I was having a craving after dinner and needed something easy and sweet. I pulled a couple of ingredients together and figured the results couldn't possibly turn out bad.
I was right! I'll be honest and say that I could have easily eaten all of them by myself but I'm so nice I shared with my husband. He loves raspberry so I let him have most of the ones with raspberry jam. I ate most of the pockets with cherry jam. They tasted like little cherry pies. Yum! These would also be good with a scoop or two of vanilla ice cream.
1 sheet of puff pastry
Jam of your choice (cherry, raspberry, apricot)
sugar for sprinkling
1 egg, lightly beaten
Preheat oven to 415 degrees. Butter a cookie sheet. Lightly beat the egg in a small bowl and set aside. Fold out pastry and cut along seams to get 3 long strips. Then cut each of those twice so you get 3 squares. I used a pizza cutter as it the easiest and cleanest way in my opinion. Place the squares onto prepared cookie sheet.
Spoon about a tablespoon of jam in the center of each square of pastry. Pull up 2 opposite corners and pinch together, then the remaining corners and pinch corners closed in the center so it forms a little pouch. Brush with beaten egg and sprinkle a pinch of sugar over the top of each pouch.
Bake for about 15-18 minutes or until golden and puffy. Makes 9 small bites.
January 1, 2013
2012 Recipes in Review
Happy New Year! I hope you had a great and memorable 2012 and welcome the new year with open arms and mind. Try something new this year! If you don't cook, give it a try. The worst that can happen is that you burn it and you can order a hot and delicious pizza. Nothing wrong with that. But the BEST that can happen is a meal that you will be proud of and your family will beg you to make it for them again. That will make you feel good. I promise. So either way, nothing to lose.
We all have our favorite go-to recipes. Sometimes we make them over and over and sometimes tweak them slightly to improve or even experiment to expand our taste buds. What is your favorite recipe that you or someone else makes that you really enjoy?
I wanted to recap a few of my favorite recipes from this past year. If you didn't have a chance to see them the first time, here they are. Click on the name below photo and it will take you to the original post and recipe. None of these recipes are hard. It's worth the minimal work it takes. Bon Appetit!
Pear Dutch Baby |
Chicken & Wild Rice Soup |
Beer & Gouda Risotto |
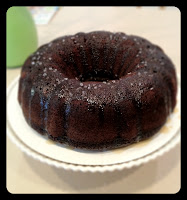
Chocolate Bundt Cake with Salted Caramel |
Garlic Parmesan Wings |
The Best Chili EVER |
Subscribe to:
Posts (Atom)